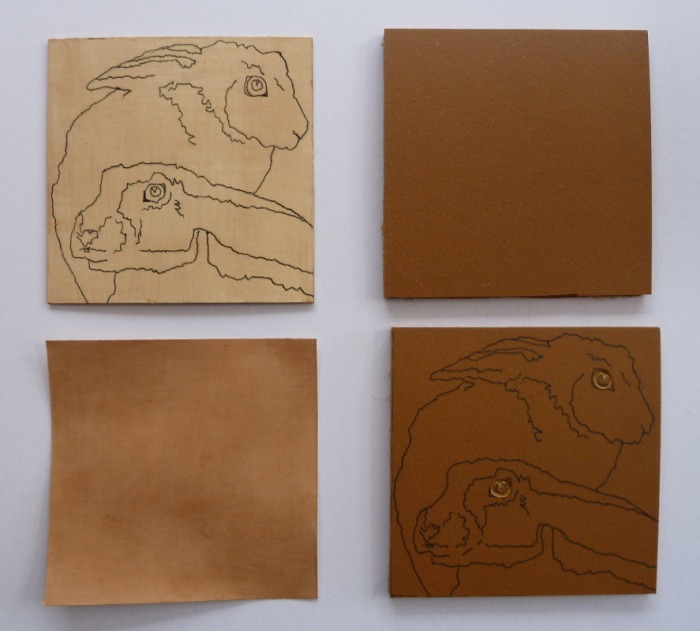
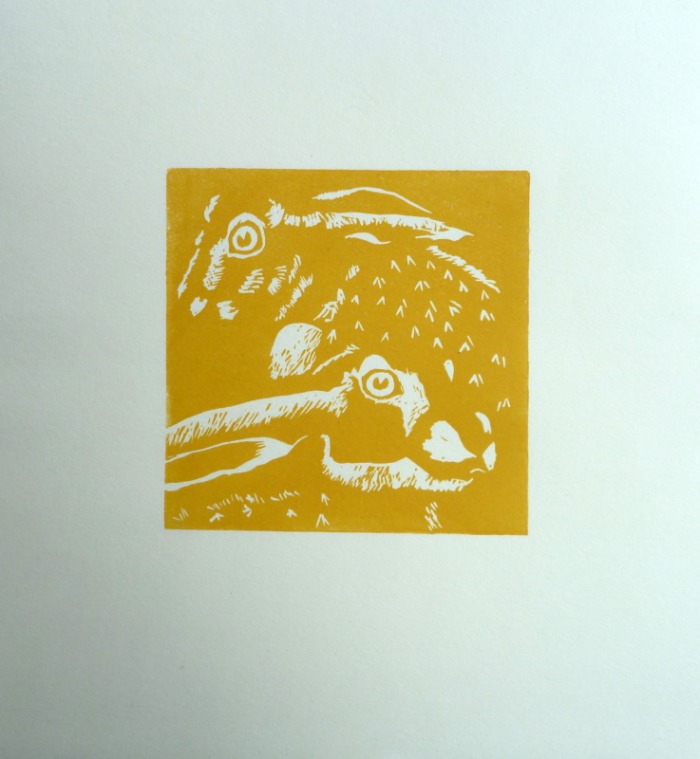
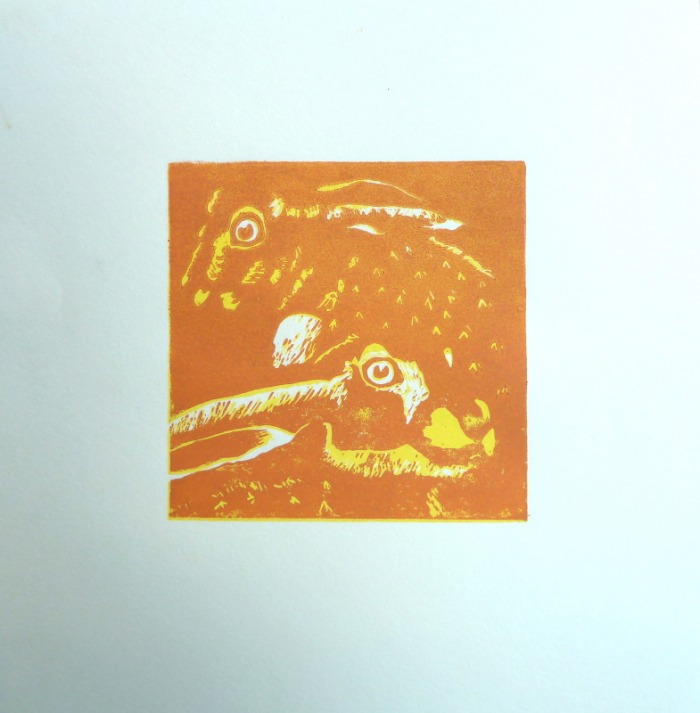
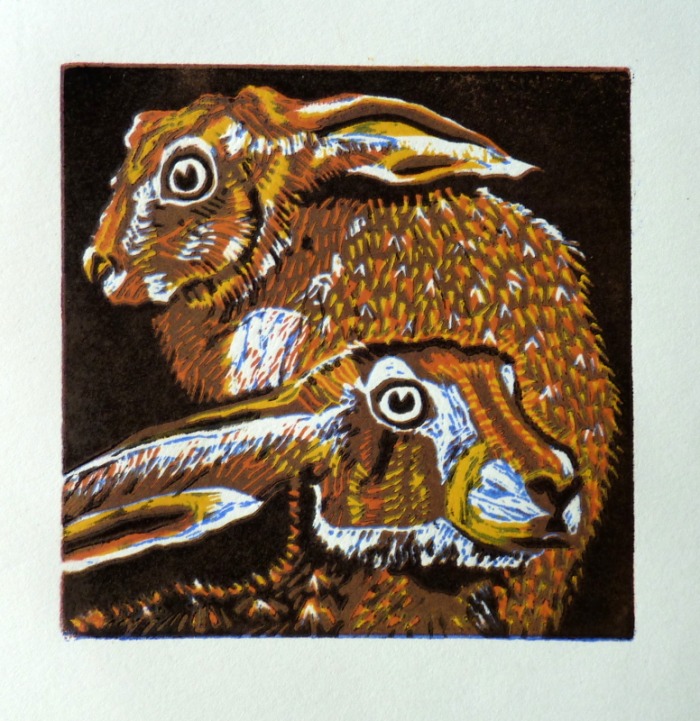
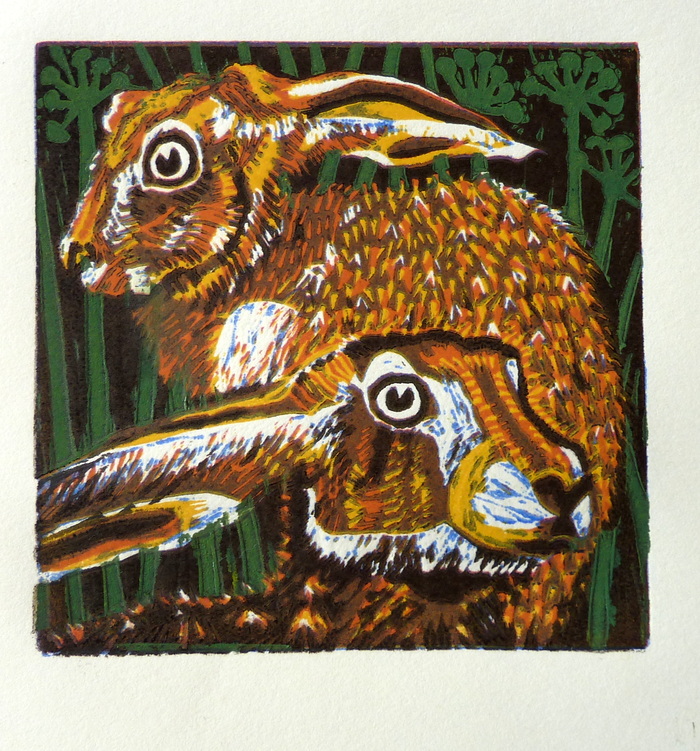
"Hares" reduction print
I have been working on a small reduction print ( 10 x 10 cm) over the past couple of weeks for an Exhibition called "Small print, big impression". Here is the journey so far...
A few weeks later and the journey is over. It ended up being six layers, which seems a reasonable number to me. I was happy with the results, but will now give myself a break from reduction prints. For a while anyway. I can't seem to resist their lure for long and I feel a large block will be my next big project.
A few weeks later and the journey is over. It ended up being six layers, which seems a reasonable number to me. I was happy with the results, but will now give myself a break from reduction prints. For a while anyway. I can't seem to resist their lure for long and I feel a large block will be my next big project.


Tuesday... just one more layer. Oh and the last one
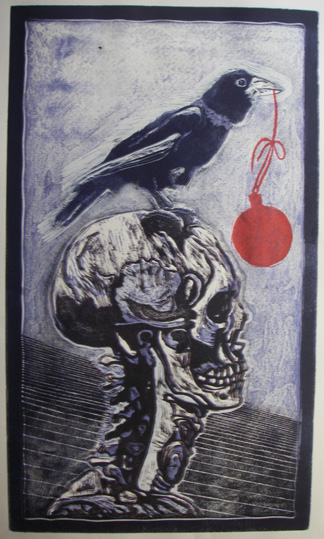
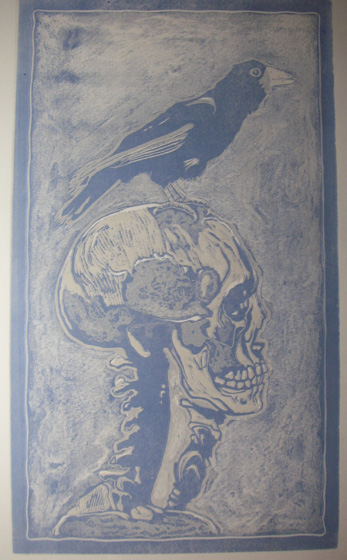
Today I thought the prints could be improved by just one more subtle brownish layer on the skull and background, leaving the crow a cooler blue/black. So my time was spent on selective rolling of a burnt sienna/royal blue ink mix - amazing how the day just disappears when you're busy. Very satisfying. Then thoughts turned to my promised "Christmas edition". I'd already cut a small Xmas bauble with string and thought a base colour of red would work well with the silver leaf, so I tested it on a waste print (too dark and opaque), added extender then printed just the two. I'll post the silver version when completed.
Another day of stage four.
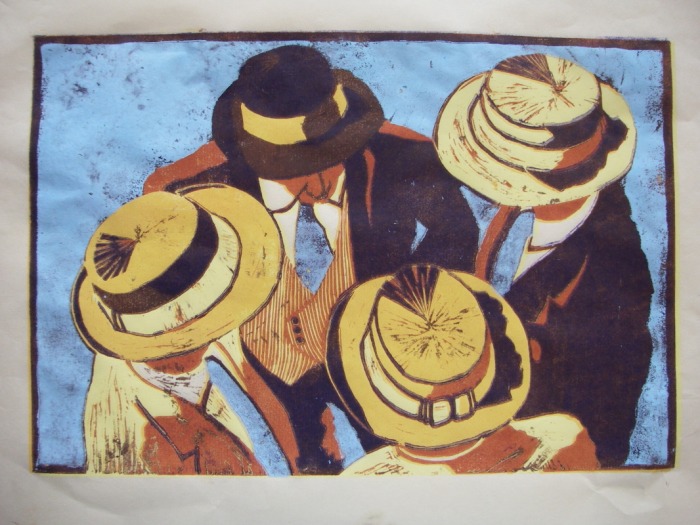
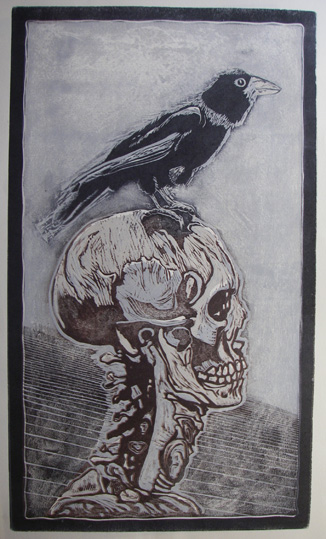
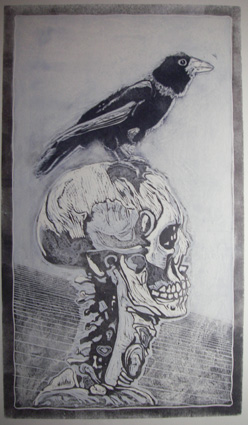
Today (Tuesday) was spent working on the skull and crow print again. It is not a quick process. However, I am almost finished with this stage and am coming round to the idea that I may well have done enough. I'm quite happy with the results and pleased with the various colour combinations. I'll wait for a week or so to look at them again before making a final decision. I did plan to give a few of them a "Christmas feel" with the crow holding a string in its beak with a Christmas tree bauble on the end decorated with silver leaf. Maybe next week...
Fourth stage printing.
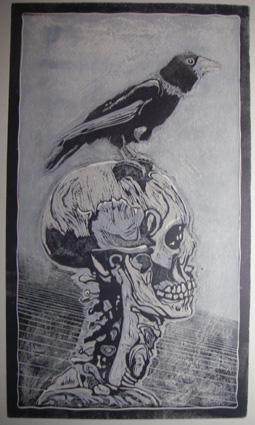
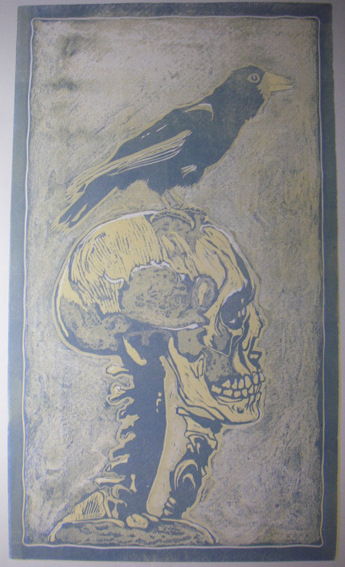
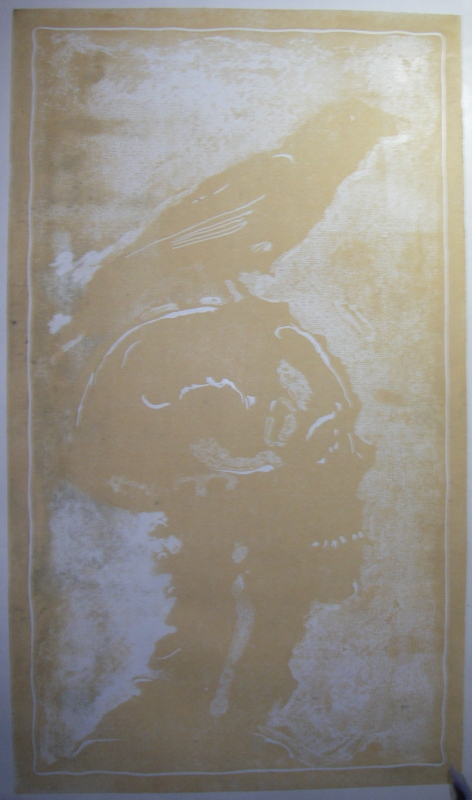
The fourth layer got under way today. I was in several minds about what I was looking for and as you can see from the prints below this edition is becoming very "variable" indeed. The ink was a mixture of blue and orange so that I could vary the colour from a brown to blue hue with a little extender added. Some were printed in their entirity, others I only printed the crow, leaving the skull as layer three.


Third layer.
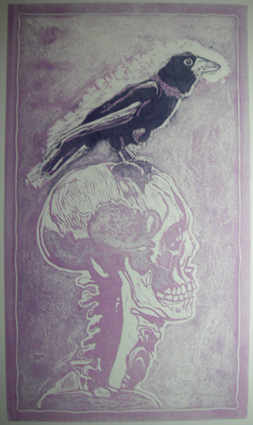
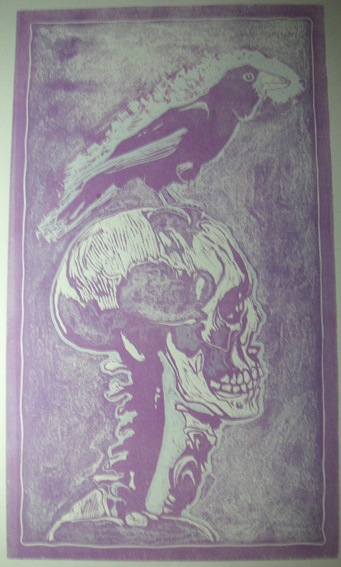
.Got the third layer started today (Thursday), but it was slow going for some reason and I only got half of them done. The colour was Prussian blue mixed with Magenta and a little white, plenty of extender again to keep it transparent. Print on left printed over the grey first layer, centre over yellowish bone colour and the print on the right I remixed a magenta/ white colour. That was the point I decided I'd had enough, cleaned up and went home! I do like the way the image is "firming up" as I print more layers.
Layer two
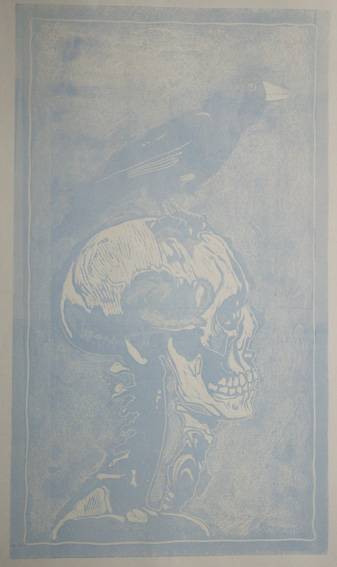
My second layer was cut over Sunday and Monday, a lot of tricky carving, then printed in FDPW on Tuesday. The colour was a pale blue/grey mixed from ultramarine, burnt sienna, white and much extender. I'm happy with the way the image is coming together and can't wait to get the next stage done. The first image is layer two printed on its own, the second over grey and the third over yellowish bone colour.

Edition started.
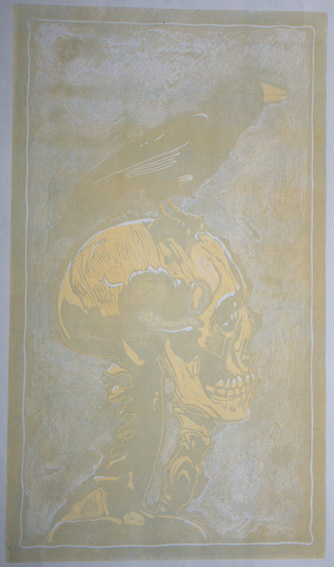
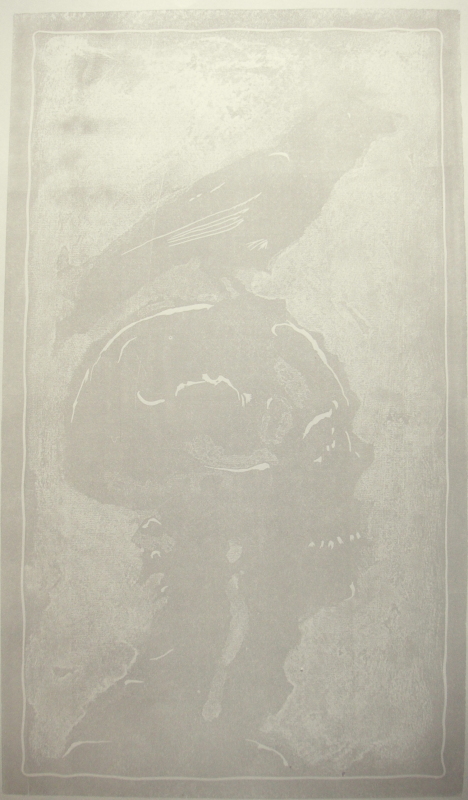
I went into the workshop on Saturday and with no-one else there had time and space to get on with my print . I started off mixing up a yellow ochre/raw sienna/white "bone"" colour, but was not happy with the look and went instead for a very pale warm grey as my first layer. I'm afraid it doesn't show up well on the photo, but I'm very happy with the result. I printed 15 in all, 3 of the the yellowish which will become my test pieces and 12 of the grey. I wonder how many of them will make it through to the final colour without incident? I'm aiming for 10...
Time to start cutting the next layer
Time to start cutting the next layer
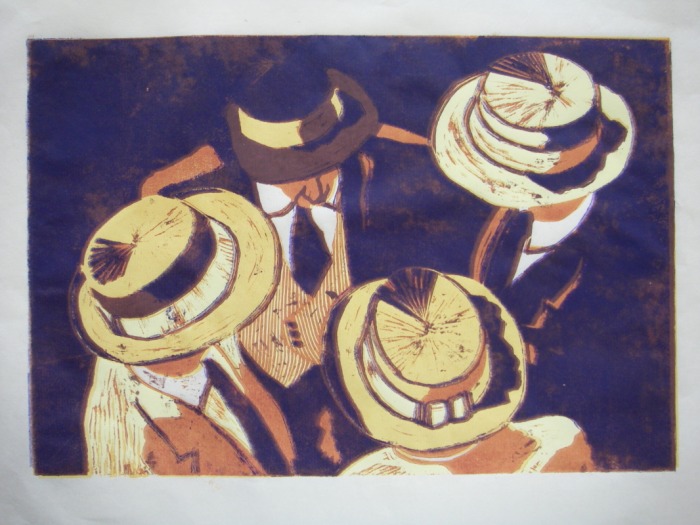
Skull and Crow reduction print
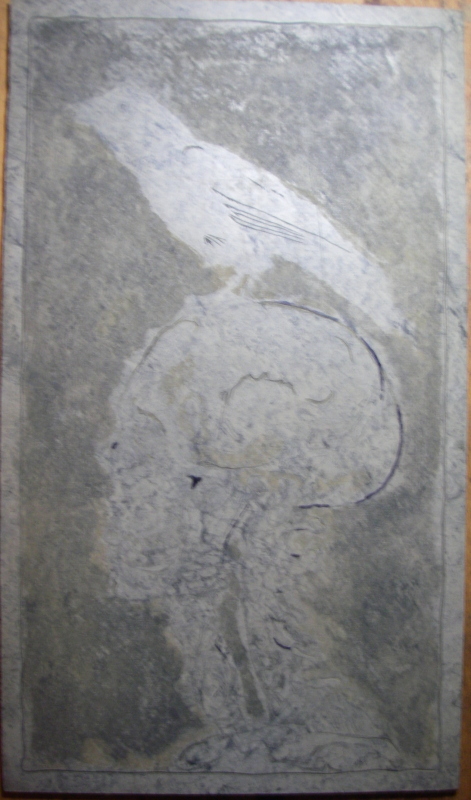
I have started another reduction, somewhat larger at 46 x 26.5cm. The lino is mottled grey flooring lino which cuts very nicely and takes caustic soda particularly well. It tends to break the surface down into an almost hessian type pattern that I do like.
The first picture on the left is the lino block, which I mounted on thin MDF to alleviate the "curling" problem. The photo on the right is a first proof of my first cut. I am looking for an aged bone colour, so I think a lighter colour is needed and some more cutting before I start the edition. Next thing is to make up a registration board to fit the ivory coloured Japanese paper I will be using, which is 61 x 43cm
I will post more photos as I make progress, so keep looking in!
Step by step reduction printing

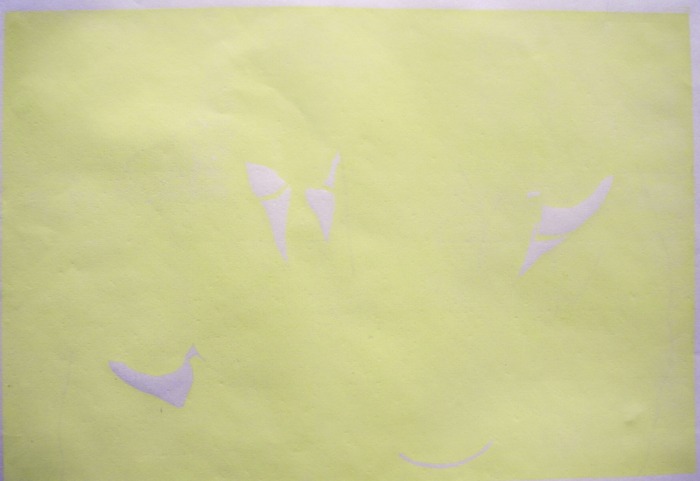
For the first stage all the parts you want to remain white on the print are cut out and the lino rolled up with the first colour, in this case a pale yellow.
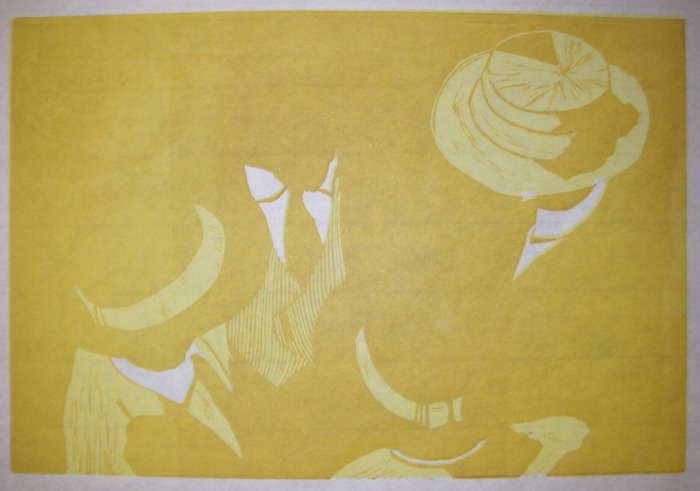
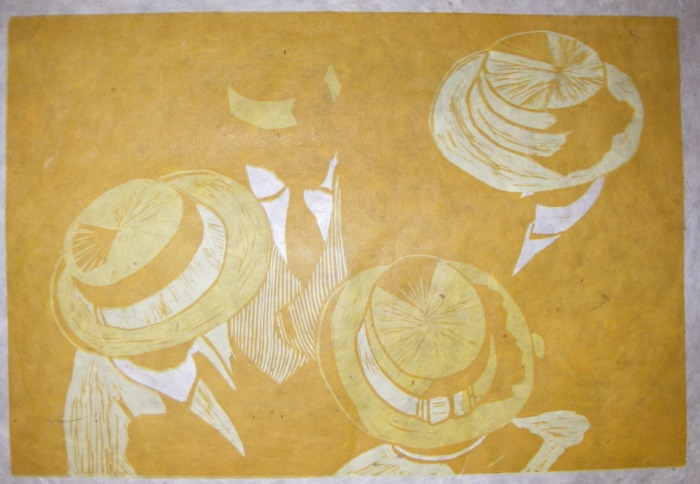
Everything that is to remain yellow is now cut out. If you are using oil based inks it will take around two days for the ink to dry properly. You can print with the first layer still wet, but the colours will mix on the paper and can produce a spotty result as you pull the paper off the lino. Do give it a try though as you may like the result for some subjects. The next colour is more of a pale orange/ raw sienna.
Again, remove anything you want to leave the pale sienna and I have rolled on a darker brown with less yellow, another cut followed by a mixture of raw sienna and purple for the shadow areas.
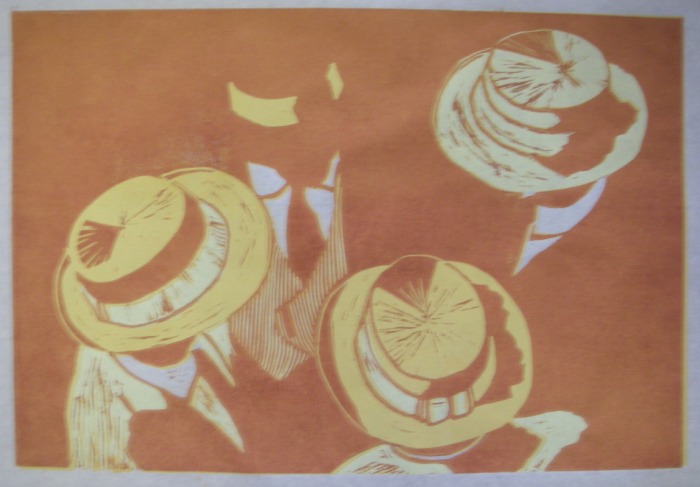
The next layer is for the background and is a mixture of opaque white, ultramarine with a touch of magenta, giving a palish blue with a lilac tint. This was by far the most difficult layer to print as with so much of the lino now cut away it is impossible just to roll it up without the brayer catching and leaving ink in the large cut away areas. The easiest way to avoid this problem is to make a mask of the cutaway areas. I use thick tracing paper which is strong enough to survive editioning. I ink the lino then lays on the mask, covering any stray ink I do not want to print. I confess I did ruin two prints when I got distracted and forgot to lay on the mask! I think you do have to allow for a certain amount of wastage and do more prints than you finally want to take account of human frailty.
Hope this is helpful
Everything that is to remain yellow is now cut out. If you are using oil based inks it will take around two days for the ink to dry properly. You can print with the first layer still wet, but the colours will mix on the paper and can produce a spotty result as you pull the paper off the lino. Do give it a try though as you may like the result for some subjects. The next colour is more of a pale orange/ raw sienna.
Again, remove anything you want to leave the pale sienna and I have rolled on a darker brown with less yellow, another cut followed by a mixture of raw sienna and purple for the shadow areas.
The next layer is for the background and is a mixture of opaque white, ultramarine with a touch of magenta, giving a palish blue with a lilac tint. This was by far the most difficult layer to print as with so much of the lino now cut away it is impossible just to roll it up without the brayer catching and leaving ink in the large cut away areas. The easiest way to avoid this problem is to make a mask of the cutaway areas. I use thick tracing paper which is strong enough to survive editioning. I ink the lino then lays on the mask, covering any stray ink I do not want to print. I confess I did ruin two prints when I got distracted and forgot to lay on the mask! I think you do have to allow for a certain amount of wastage and do more prints than you finally want to take account of human frailty.
Hope this is helpful